

|


Tables
- Create a webpage like in the first chapter and name it "Firstweb2". Don't
forget to insert the basic tags, that is:
<html><title>Tables</title><body></body></html>
- Between the <body></body> tags, insert this:
<table><table border="3" align="center" width="80%" height="200">
<tr><td>A</td><td>B</td><td>C</td></tr>
<tr><td>D</td><td>E</td><td>F</td></tr>
</table>
- A table has rows, which lie horizontally and columns, which lie vertically. Each square
in a table is called a cell. The tags
<table></table> are to
inform the browser that it is a table. In HTML, we put in data in each cell by row. In the
above example, the <tr></tr> (table row) tags informs the browser
that A,B and C are in one row, while D, E and F is in another row. The <td></td>
(table data) tags are where the information in each cell is defined.
- The
<table border="3"> informs the browser of the thickness
of the table browser. You can replace the number "3" with any number, with
"0" being no border and any number larger than "0". The tag <table
align="center"> informs the browser that the table will be displayed
in the center of the browser page. You can replace "center" with
either "left" or "right", which will
position the table to the left or right of the browser page.
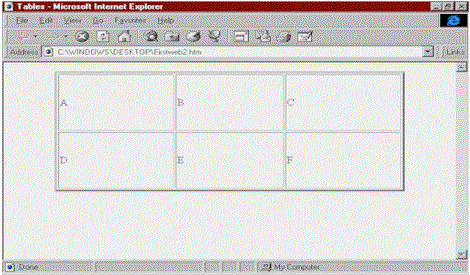
- The width attribute sets the the width (horizontally) of a table, while the height
attribute sets the height (vertically) of a table. The value of the width and height can
be assigned in percentage form or in pixels. This means that the "80%" in width
can be replaced with any percentage (eg. 30%, 100%, 200% etc.) or pixels (eg. 50, 300, 500
etc.). The same applies to the height "200". Try experimenting, but remember to
save it before viewing it in your browser. (See Diagram 9 and Diagram10)
 Diagram9 Diagram9
 Diagram10 Diagram10
- Oh, yes I forgot to give a header. Please type
<th>Making Tables</th>
after the <table> tag. Now, insert this line after the tag <...height="200">:
<...height="200" cellspacing="4" cellpadding="5">
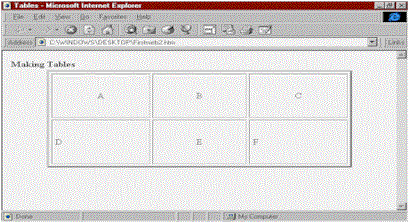
- You'll notice that the cellspacing (space between two cells) has increased to 4 pixels
due to the tag
<table cellspacing="4"> and that the
cellpadding (space between the data and the wall of the cell) has increased to 5 pixels
because of the tag <table cellpadding="5">. Try fiddling
about and see the effects. As always, remember to save before viewing in the browser. (See
Diagram 11 and Diagram 12)
- Change one of the lines to
<tr align="center"><td>A</td><td>B</td><td>C</td></tr>
- You'll notice that the data in the first row, A, B and C are in the center of the cell.
You can replace "
center" with either "Left"
or "Right". Now change the other line to:
<tr><td>D</td><td align="center">E</td><td>F</td></tr>
- Save it. You'll see that the data "E" has appeared on the center of the cell.
 Diagram11 Diagram11
 Diagram12 Diagram12
- Now change one of the lines again to:
<tr align="center" valign="top"><td>A</td><td>B</td><td>C</td></tr>
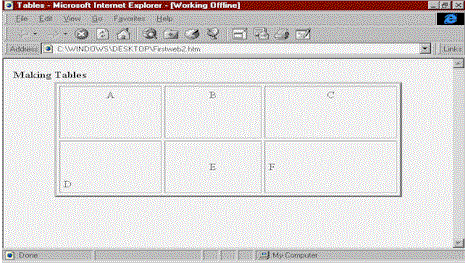
- Save it and view it in the browser. You'll notice that the vertical alignment in the row
has changed to the top because of the tag
<tr valign="top">.
You can replace "top" with either "center"
or "bottom". Change the other line to:
<tr><td valign="bottom">D</td><td align="center">E</td><td>F</td></tr>
- Notice that the letter "D" now appears in the bottom of the cell due to the
tag you added.
- Modify the line:
<tr><td valign="bottom">D</td><td align="center">E</td><td colspan="7" rowspan="3">F</td></tr>
- Save it before viewing it in the browser. The length of the cell column and row for the
letter "F" has changed. The tag <td colspan="7"> is used to
specify the width of a cell, while the tag <td rowspan="3"> specifies the
height of a cell. (See Diagram 13 and Diagram 14)
 Diagram13 Diagram13
 Diagram14 Diagram14
 Not all browsers can support the Not all browsers can support the <table>
tag, especially the old browsers. So, if you are still using old browsers, you should
download a new one.
 
Back to top
ęCopyright of Richard Long |
